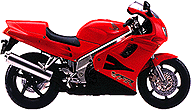
Some Viffers have asked how to remove that middle (side) panel from their '94+ VFR. This piece of the bodywork has to come off to remove the oil filter and is helpful to when adding coolant to the reservoir. If you have never removed this section of the fairing before, I might suggest that someone who has done this before help the first time which will save you at least a few gray hairs!First, place the bike on the center stand for a solid, level work platform.
It is hard to explain the motions to remove that panel and so if you have a better command of descriptive English, please give me an email suggestion. Hope this was helpful to you.
- Remove the three (3) fasteners from the bottom of the middle panel. The fasteners are 1/4 turn (counterclockwise). Next remove the rear allen bolt (round) and then the two (2) fasteners from the inside area behind the front wheel (inner cowl).
- At this point, I gently work the bottom of the middle panel loose from the inner cowl and the lower panel. It will sometimes hang at the corner that meets at the "chin" section or the piece directly behind the front wheel. When I get this section free, then I go to the next step.
- The last step is to disconnect the locking tab. The locking tab is located at the far end of the flat section of the top fairing where it meets the middle panel, just above the place where the round allen bolt was located. The top and middle panel are secured or snapped together at this point. I have found it helpful to have someone hold the upper section next to the locking tab with the head of an allen wrench tucked under the plastic while I put slight pressure on the lower section next to the locking tab to disengage the locking tab. The locking tab releases with a plastic popping sound. At this point, the middle panel should be free. BTW, this last step can be nerve racking and so go slowing.
- Installation is just the reverse steps. I will first engage the top two (2) tabs or grooves and the align the front leading edges of the middle panel with the top panel and then rotate the rear end of the middle panel into place. Next, work the entire leading edge of the middle panel into place with the inner cowl section and the bottom cowl section.
- Reinstall the bottom three (3) fasteners and the two (2) from the inner cowl section. If the fit is correct, then snap the locking tab into place. Finally, replace the allen bolt.
